
In this step of Creating an Opportunity, you will be selecting the Market Baskets to be part of your project.
Market Basket Selection
Click the “Add Basket” button to view the available Market Baskets that can be added to the Opportunity.
The Baskets have 4 detail columns to help you identify the opportunity:
1. Name – Name of the basket
2. Date Created – Date the basket was created
3. # items – Number of items that are in the basket
4. Spend – A dropdown allows you to specify the date range

You can search for a specific basket name or scroll through the list of available baskets. (Note: if the current opportunity already has any basket(s), those basket(s) will not show in the Select Baskets screen.)
To select, click the check box next to the basket name and click “Add to Opportunity." Up to 5 baskets can be added per opportunity.
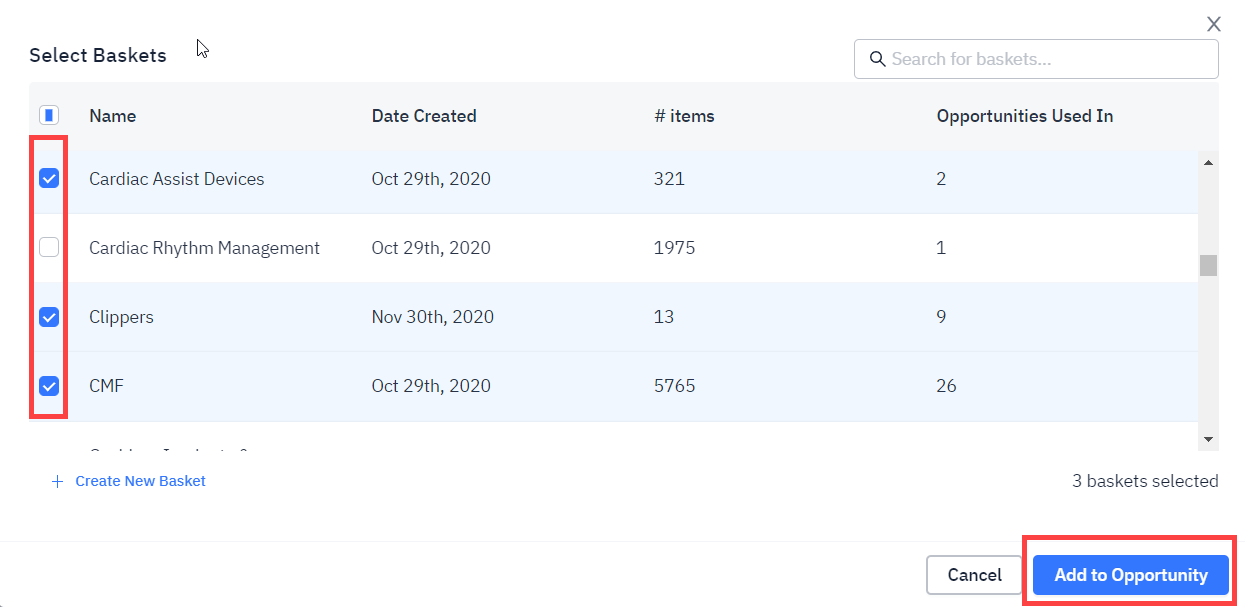
Click "Cancel" to return to the Select Baskets and Set Goals screen, without adding the basket(s).