
Add Crosses – Upload Crosses
Before getting started, please check out the file upload requirements page.
Uploading cross references for projects can significantly increase the bid coverage for a supplier. This enables the provider to see all equivalent products in a given vendor's catalog compared to their current usage. We recommend building a cross reference based on the usage in the project if possible. Click here for more info on where to access project usage in the vendor portal.
When you are ready to upload your cross reference file, go to the configurations section of the Curvo Supplier portal:

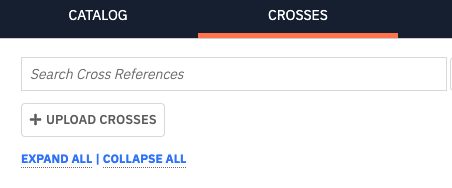
Select the Crosses sections and the Upload Crosses button:
Next, you will be taken to the upload screen where you can drag and drop your cross reference excel file. Once the file is selected/dropped, it will have a virus check run and the file will be prepped for upload. Once the file is ready, the file type and file size will show below the file name and the paper icon has a complete blue circle around it, the you will click “Next”. The cross reference will default to the "system auto generated" list name unless you want to add a unique name for this particular cross reference. If you want a unique list name, document that in the "Add a new list name" field prior to selecting next.
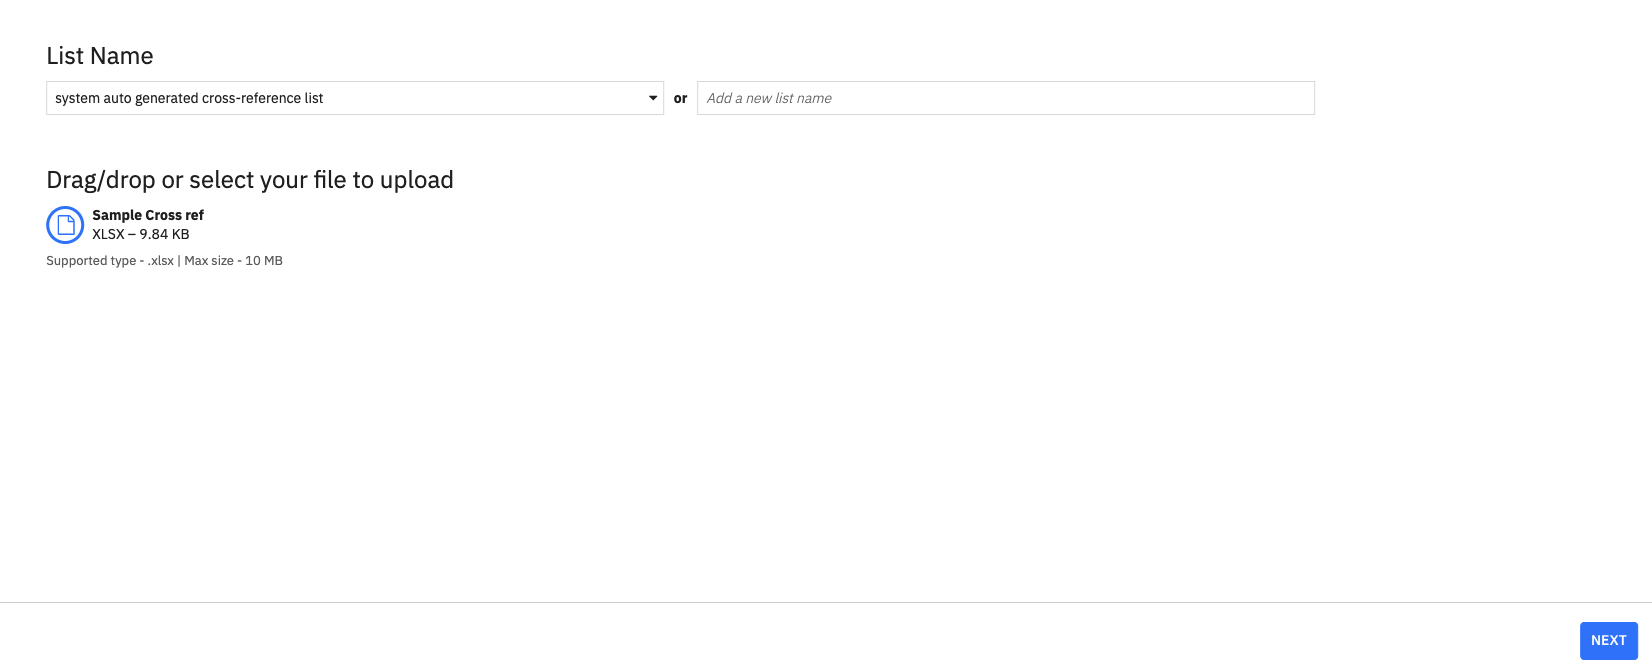
In the next step, Upload Cross Reference Excel, you will see "List Name", where they can choose from an existing file name that was previously uploaded or a new name can be entered. By default it will be named after the file uploaded. The next section of the Upload Cross Reference Excel page is a preview of the file being uploaded. Followed by the Mapping Grid.
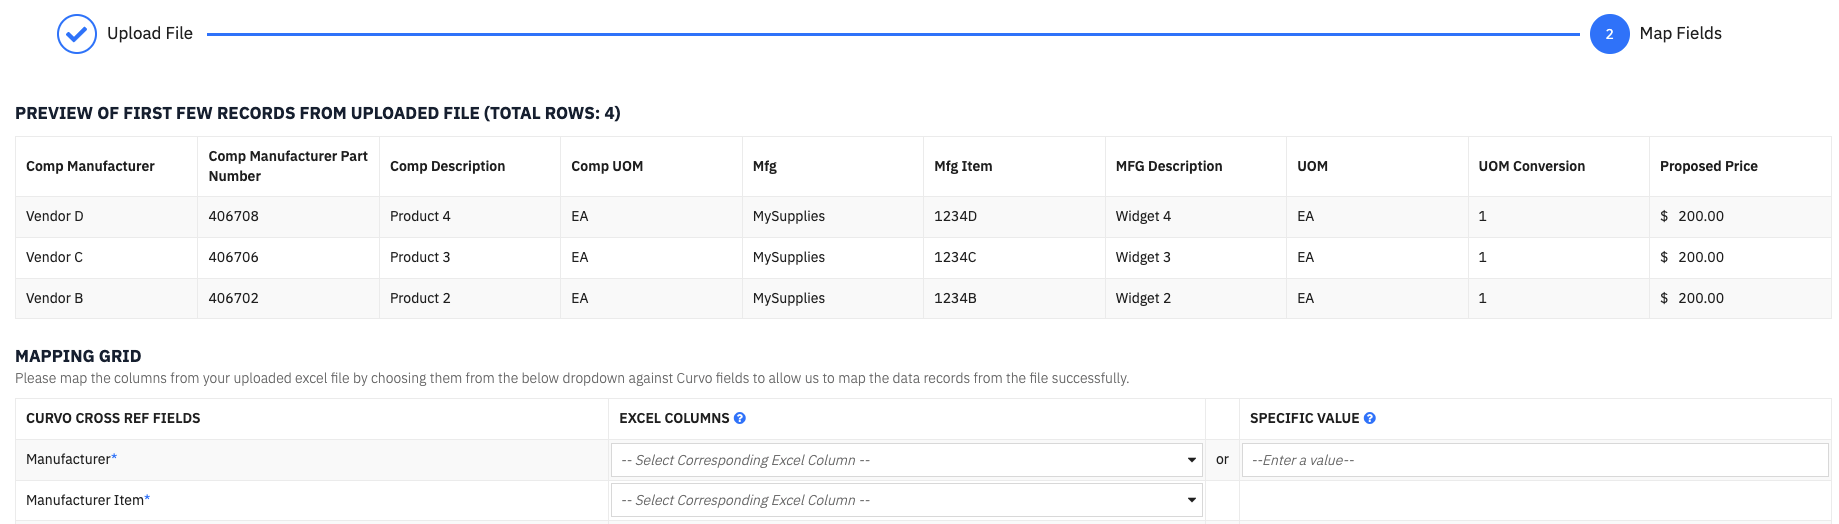
1. Manufacturer (required) - Note: Map this to the column representing your company.
2. Manufacturer Item (required) - Note: Map this to your catalog item numbers.
3. Vendor (optional)
4. Vendor Item (optional)
5. Description (optional) - Note: Map this to your product description field. Not a required field but very useful for the provider to see the product description when evaluating potential conversions.
6. GTIN(optional)
7. Competitor Manufacturer (required) - Note: Map this to the competitive manufacturer name column you are crossing against.
8. Competitor Manufacturer Item (required) - Note: Map this to the competitive manufacturer item number column you are crossing against.
9. Competitor Vendor (optional)
10. Competitor Vendor Item (optional)
11. Competitor Description (optional) - Note: Map this to the competitive manufacturer item description column you are crossing against. Mapping this in will improve cross ref matching.
12. Competitor GTIN (optional)
Once the mapping is complete click the Submit button. You should receive a confirmation message once this is complete. You will then be taken to a confirmation screen that will confirm when the upload has been submitted successfully. The upload can take several minutes to process, so check the status of the upload by clicking on the “Batch Results” link on the Crosses Uploaded confirmation screen.